This is the Dell R7425 host known as r7425-01.
At idle, despite holding 12 x 12TB HDD, this chassis is pulling about 300-350 watts.
[22:23 r7425-01 dvl ~] % uname -a
FreeBSD r7425-01.int.unixathome.org 15.0-RELEASE FreeBSD 15.0-RELEASE releng/15.0-n280995-7aedc8de6446 GENERIC amd64
gpart
[22:26 r7425-01 dvl ~] % gpart show
=>       40  937703008  da14  GPT  (447G)
         40     532480     1  efi  (260M)
     532520       2008        - free -  (1.0M)
     534528   16777216     2  freebsd-swap  (8.0G)
   17311744  920389632     3  freebsd-zfs  (439G)
  937701376       1672        - free -  (836K)

=>       40  937703008  da13  GPT  (447G)
         40     532480     1  efi  (260M)
     532520       2008        - free -  (1.0M)
     534528   16777216     2  freebsd-swap  (8.0G)
   17311744  920389632     3  freebsd-zfs  (439G)
  937701376       1672        - free -  (836K)

=>         40  23437770672  da7  GPT  (11T)
           40  23437765632    1  freebsd-zfs  (11T)
  23437765672         5040       - free -  (2.5M)

=>         40  23437770672  da6  GPT  (11T)
           40  23437765632    1  freebsd-zfs  (11T)
  23437765672         5040       - free -  (2.5M)

=>         40  23437770672  da10  GPT  (11T)
           40  23437765632     1  freebsd-zfs  (11T)
  23437765672         5040        - free -  (2.5M)

=>         40  23437770672  da1  GPT  (11T)
           40  23437765632    1  freebsd-zfs  (11T)
  23437765672         5040       - free -  (2.5M)

=>         40  23437770672  da11  GPT  (11T)
           40  23437765632     1  freebsd-zfs  (11T)
  23437765672         5040        - free -  (2.5M)

=>         40  23437770672  da2  GPT  (11T)
           40  23437765632    1  freebsd-zfs  (11T)
  23437765672         5040       - free -  (2.5M)

=>         40  23437770672  da5  GPT  (11T)
           40  23437765632    1  freebsd-zfs  (11T)
  23437765672         5040       - free -  (2.5M)

=>         40  23437770672  da3  GPT  (11T)
           40  23437765632    1  freebsd-zfs  (11T)
  23437765672         5040       - free -  (2.5M)

=>         40  23437770672  da0  GPT  (11T)
           40  23437765632    1  freebsd-zfs  (11T)
  23437765672         5040       - free -  (2.5M)

=>         40  23437770672  da8  GPT  (11T)
           40  23437765632    1  freebsd-zfs  (11T)
  23437765672         5040       - free -  (2.5M)

=>         40  23437770672  da4  GPT  (11T)
           40  23437765632    1  freebsd-zfs  (11T)
  23437765672         5040       - free -  (2.5M)

=>         40  23437770672  da9  GPT  (11T)
           40  23437765632    1  freebsd-zfs  (11T)
  23437765672         5040       - free -  (2.5M)
zpool list
[22:27 r7425-01 dvl ~] % zpool list -v
NAME                       SIZE  ALLOC   FREE  CKPOINT  EXPANDSZ   FRAG    CAP  DEDUP    HEALTH  ALTROOT
data01                    65.4T  2.19G  65.4T        -         -     0%     0%  1.00x    ONLINE  -
  mirror-0                10.9T   388M  10.9T        -         -     0%  0.00%      -    ONLINE
    gpt/slot_0_8CGSV9DG   10.9T      -      -        -         -      -      -      -    ONLINE
    gpt/slot_1_8CGSXG6G   10.9T      -      -        -         -      -      -      -    ONLINE
  mirror-1                10.9T   379M  10.9T        -         -     0%  0.00%      -    ONLINE
    gpt/slot_2_8HGAWR3H   10.9T      -      -        -         -      -      -      -    ONLINE
    gpt/slot_3_8CGSVS3G   10.9T      -      -        -         -      -      -      -    ONLINE
  mirror-2                10.9T   377M  10.9T        -         -     0%  0.00%      -    ONLINE
    gpt/slot_4_8CGSB6YG   10.9T      -      -        -         -      -      -      -    ONLINE
    gpt/slot_5_8CGSZ0VG   10.9T      -      -        -         -      -      -      -    ONLINE
  mirror-3                10.9T   368M  10.9T        -         -     0%  0.00%      -    ONLINE
    gpt/slot_6_8CGSZY5G   10.9T      -      -        -         -      -      -      -    ONLINE
    gpt/slot_7_8CGSV8YG   10.9T      -      -        -         -      -      -      -    ONLINE
  mirror-4                10.9T   362M  10.9T        -         -     0%  0.00%      -    ONLINE
    gpt/slot_8_8CGS875G   10.9T      -      -        -         -      -      -      -    ONLINE
    gpt/slot_9_8CGSBA2G   10.9T      -      -        -         -      -      -      -    ONLINE
  mirror-5                10.9T   365M  10.9T        -         -     0%  0.00%      -    ONLINE
    gpt/slot_10_8CGSX4UG  10.9T      -      -        -         -      -      -      -    ONLINE
    gpt/slot_11_8CGSDEHG  10.9T      -      -        -         -      -      -      -    ONLINE
zroot                      436G  2.20G   434G        -         -     0%     0%  1.00x    ONLINE  -
  mirror-0                 436G  2.20G   434G        -         -     0%  0.50%      -    ONLINE
    da13p3                 439G      -      -        -         -      -      -      -    ONLINE
    da14p3                 439G      -      -        -         -      -      -      -    ONLINE
zpool status
[22:27 r7425-01 dvl ~] % zpool status
  pool: data01
 state: ONLINE
config:

	NAME                      STATE     READ WRITE CKSUM
	data01                    ONLINE       0     0     0
	  mirror-0                ONLINE       0     0     0
	    gpt/slot_0_8CGSV9DG   ONLINE       0     0     0
	    gpt/slot_1_8CGSXG6G   ONLINE       0     0     0
	  mirror-1                ONLINE       0     0     0
	    gpt/slot_2_8HGAWR3H   ONLINE       0     0     0
	    gpt/slot_3_8CGSVS3G   ONLINE       0     0     0
	  mirror-2                ONLINE       0     0     0
	    gpt/slot_4_8CGSB6YG   ONLINE       0     0     0
	    gpt/slot_5_8CGSZ0VG   ONLINE       0     0     0
	  mirror-3                ONLINE       0     0     0
	    gpt/slot_6_8CGSZY5G   ONLINE       0     0     0
	    gpt/slot_7_8CGSV8YG   ONLINE       0     0     0
	  mirror-4                ONLINE       0     0     0
	    gpt/slot_8_8CGS875G   ONLINE       0     0     0
	    gpt/slot_9_8CGSBA2G   ONLINE       0     0     0
	  mirror-5                ONLINE       0     0     0
	    gpt/slot_10_8CGSX4UG  ONLINE       0     0     0
	    gpt/slot_11_8CGSDEHG  ONLINE       0     0     0

errors: No known data errors

  pool: zroot
 state: ONLINE
config:

	NAME        STATE     READ WRITE CKSUM
	zroot       ONLINE       0     0     0
	  mirror-0  ONLINE       0     0     0
	    da13p3  ONLINE       0     0     0
	    da14p3  ONLINE       0     0     0

errors: No known data errors
zfs list
[22:27 r7425-01 dvl ~] % zfs list
NAME                         USED  AVAIL  REFER  MOUNTPOINT
data01                      2.19G  65.3T    96K  /data01
data01/jails                1.22G  65.3T    96K  /jails
data01/jails/pkg02           880M  65.3T   880M  /jails/pkg02
data01/jails/testing         374M  65.3T   374M  /jails/testing
data01/mkjail                980M  65.3T    96K  /data01/mkjail
data01/mkjail/15.0-RELEASE   980M  65.3T   980M  /data01/mkjail/15.0-RELEASE
data01/poudriere              96K  65.3T    96K  /data01/poudriere
zroot                       2.20G   420G    96K  /zroot
zroot/ROOT                  2.19G   420G    96K  none
zroot/ROOT/default          2.19G   420G  2.19G  /
zroot/home                   376K   420G   104K  /home
zroot/home/dvl               272K   420G   168K  /home/dvl
zroot/jails                   96K   420G    96K  /jails
zroot/tmp                    280K   420G   280K  /tmp
zroot/usr                    288K   420G    96K  /usr
zroot/usr/ports               96K   420G    96K  /usr/ports
zroot/usr/src                 96K   420G    96K  /usr/src
zroot/var                   1.27M   420G    96K  /var
zroot/var/audit               96K   420G    96K  /var/audit
zroot/var/crash               96K   420G    96K  /var/crash
zroot/var/log                716K   420G   716K  /var/log
zroot/var/mail               160K   420G   160K  /var/mail
zroot/var/tmp                132K   420G   132K  /var/tmp
dmesg
[22:27 r7425-01 dvl ~] % cat /var/run/dmesg.boot
---<<BOOT>>---
Copyright (c) 1992-2025 The FreeBSD Project.
Copyright (c) 1979, 1980, 1983, 1986, 1988, 1989, 1991, 1992, 1993, 1994
	The Regents of the University of California. All rights reserved.
FreeBSD is a registered trademark of The FreeBSD Foundation.
FreeBSD 15.0-RELEASE releng/15.0-n280995-7aedc8de6446 GENERIC amd64
FreeBSD clang version 19.1.7 (https://github.com/llvm/llvm-project.git llvmorg-19.1.7-0-gcd708029e0b2)
VT(efifb): resolution 1024x768
CPU: AMD EPYC 7261 8-Core Processor                  (2495.44-MHz K8-class CPU)
  Origin="AuthenticAMD"  Id=0x800f12  Family=0x17  Model=0x1  Stepping=2
  Features=0x178bfbff<FPU,VME,DE,PSE,TSC,MSR,PAE,MCE,CX8,APIC,SEP,MTRR,PGE,MCA,CMOV,PAT,PSE36,CLFLUSH,MMX,FXSR,SSE,SSE2,HTT>
  Features2=0x7ed8320b<SSE3,PCLMULQDQ,MON,SSSE3,FMA,CX16,SSE4.1,SSE4.2,MOVBE,POPCNT,AESNI,XSAVE,OSXSAVE,AVX,F16C,RDRAND>
  AMD Features=0x2e500800<SYSCALL,NX,MMX+,FFXSR,Page1GB,RDTSCP,LM>
  AMD Features2=0x35c233ff<LAHF,CMP,SVM,ExtAPIC,CR8,ABM,SSE4A,MAS,Prefetch,OSVW,SKINIT,WDT,TCE,Topology,PCXC,PNXC,DBE,PL2I,MWAITX>
  Structured Extended Features=0x209c01a9<FSGSBASE,BMI1,AVX2,SMEP,BMI2,RDSEED,ADX,SMAP,CLFLUSHOPT,SHA>
  XSAVE Features=0xf<XSAVEOPT,XSAVEC,XINUSE,XSAVES>
  AMD Extended Feature Extensions ID EBX=0x1007<CLZERO,IRPerf,XSaveErPtr,IBPB>
  SVM: NP,NRIP,VClean,AFlush,DAssist,NAsids=32768
  TSC: P-state invariant, performance statistics
real memory  = 414447566848 (395248 MB)
avail memory = 402896633856 (384232 MB)
Event timer "LAPIC" quality 600
ACPI APIC Table: <DELL   PE_SC3  >
FreeBSD/SMP: Multiprocessor System Detected: 32 CPUs
FreeBSD/SMP: 2 package(s) x 4 groups x 2 cache groups x 1 core(s) x 2 hardware threads
random: registering fast source Intel Secure Key Seed
random: fast provider: "Intel Secure Key Seed"
random: unblocking device.
ioapic0: MADT APIC ID 128 != hw id 0
ioapic1: MADT APIC ID 129 != hw id 0
ioapic2: MADT APIC ID 130 != hw id 0
ioapic3: MADT APIC ID 131 != hw id 0
ioapic4: MADT APIC ID 132 != hw id 0
ioapic5: MADT APIC ID 133 != hw id 0
ioapic6: MADT APIC ID 134 != hw id 0
ioapic7: MADT APIC ID 135 != hw id 0
ioapic8: MADT APIC ID 136 != hw id 0
ioapic0 <Version 2.1> irqs 0-23
ioapic1 <Version 2.1> irqs 24-55
ioapic2 <Version 2.1> irqs 56-87
ioapic3 <Version 2.1> irqs 88-119
ioapic4 <Version 2.1> irqs 120-151
ioapic5 <Version 2.1> irqs 152-183
ioapic6 <Version 2.1> irqs 184-215
ioapic7 <Version 2.1> irqs 216-247
ioapic8 <Version 2.1> irqs 248-279
Launching APs: 3 5 1 4 12 2 7 23 22 6 29 11 24 9 16 17 20 21 8 10 30 15 27 14 13 18 19 25 28 26 31
random: entropy device external interface
kbd0 at kbdmux0
efirtc0: <EFI Realtime Clock>
efirtc0: registered as a time-of-day clock, resolution 1.000000s
smbios0: <System Management BIOS> at iomem 0x6e8b3000-0x6e8b3017
smbios0: Entry point: v3 (64-bit), Version: 3.2
aesni0: <AES-CBC,AES-CCM,AES-GCM,AES-ICM,AES-XTS,SHA1,SHA256>
acpi0: <DELL PE_SC3>
acpi0: Power Button (fixed)
hpet0: <High Precision Event Timer> iomem 0xfed00000-0xfed001ff on acpi0
Timecounter "HPET" frequency 14318180 Hz quality 950
Event timer "HPET" frequency 14318180 Hz quality 350
Event timer "HPET1" frequency 14318180 Hz quality 350
Event timer "HPET2" frequency 14318180 Hz quality 350
attimer0: <AT timer> port 0x40-0x43 irq 0 on acpi0
Timecounter "i8254" frequency 1193182 Hz quality 0
Event timer "i8254" frequency 1193182 Hz quality 100
atrtc0: <AT realtime clock> port 0x70-0x71 on acpi0
atrtc0: registered as a time-of-day clock, resolution 1.000000s
Event timer "RTC" frequency 32768 Hz quality 0
Timecounter "ACPI-fast" frequency 3579545 Hz quality 900
acpi_timer0: <32-bit timer at 3.579545MHz> port 0x408-0x40b on acpi0
apei0: <ACPI Platform Error Interface> on acpi0
acpi_button0: <Power Button> on acpi0
pcib0: <ACPI Host-PCI bridge> port 0xcf8-0xcff numa-domain 0 on acpi0
pci0: <ACPI PCI bus> numa-domain 0 on pcib0
pci0: <base peripheral, IOMMU> at device 0.2 (no driver attached)
pcib1: <ACPI PCI-PCI bridge> at device 1.1 numa-domain 0 on pci0
pci1: <ACPI PCI bus> numa-domain 0 on pcib1
pci1: <network, ethernet> at device 0.0 (no driver attached)
pci1: <network, ethernet> at device 0.1 (no driver attached)
pcib2: <ACPI PCI-PCI bridge> at device 1.3 numa-domain 0 on pci0
pci2: <ACPI PCI bus> numa-domain 0 on pcib2
pcib3: <PCI-PCI bridge> at device 0.0 numa-domain 0 on pci2
pci3: <PCI bus> numa-domain 0 on pcib3
vgapci0: <VGA-compatible display> mem 0xeb000000-0xebffffff,0xf9808000-0xf980bfff,0xf9000000-0xf97fffff at device 0.0 numa-domain 0 on pci3
vgapci0: Boot video device
pcib4: <ACPI PCI-PCI bridge> at device 1.4 numa-domain 0 on pci0
pci4: <ACPI PCI bus> numa-domain 0 on pcib4
bge0: <Broadcom NetXtreme Gigabit Ethernet, ASIC rev. 0x5720000> mem 0xec030000-0xec03ffff,0xec040000-0xec04ffff,0xec050000-0xec05ffff at device 0.0 numa-domain 0 on pci4
bge0: APE FW version: NCSI v1.5.61.0
bge0: CHIP ID 0x05720000; ASIC REV 0x5720; CHIP REV 0x57200; PCI-E
miibus0: <MII bus> numa-domain 0 on bge0
brgphy0: <BCM5720C 1000BASE-T media interface> PHY 1 on miibus0
brgphy0:  10baseT, 10baseT-FDX, 100baseTX, 100baseTX-FDX, 1000baseT, 1000baseT-master, 1000baseT-FDX, 1000baseT-FDX-master, auto, auto-flow
bge0: Using defaults for TSO: 65518/35/2048
bge0: Ethernet address: b0:26:28:b3:5b:38
bge1: <Broadcom NetXtreme Gigabit Ethernet, ASIC rev. 0x5720000> mem 0xec000000-0xec00ffff,0xec010000-0xec01ffff,0xec020000-0xec02ffff at device 0.1 numa-domain 0 on pci4
bge1: APE FW version: NCSI v1.5.61.0
bge1: CHIP ID 0x05720000; ASIC REV 0x5720; CHIP REV 0x57200; PCI-E
miibus1: <MII bus> numa-domain 0 on bge1
brgphy1: <BCM5720C 1000BASE-T media interface> PHY 2 on miibus1
brgphy1:  10baseT, 10baseT-FDX, 100baseTX, 100baseTX-FDX, 1000baseT, 1000baseT-master, 1000baseT-FDX, 1000baseT-FDX-master, auto, auto-flow
bge1: Using defaults for TSO: 65518/35/2048
bge1: Ethernet address: b0:26:28:b3:5b:39
pcib5: <ACPI PCI-PCI bridge> at device 7.1 numa-domain 0 on pci0
pci5: <ACPI PCI bus> numa-domain 0 on pcib5
pci5: <encrypt/decrypt> at device 0.2 (no driver attached)
xhci0: <XHCI (generic) USB 3.0 controller> mem 0xf9b00000-0xf9bfffff at device 0.3 numa-domain 0 on pci5
xhci0: 64 bytes context size, 64-bit DMA
xhci0: xECP capabilities <LEGACY,PROTO,PROTO,DEBUG>
usbus0 numa-domain 0 on xhci0
usbus0: 5.0Gbps Super Speed USB v3.0
pcib6: <ACPI PCI-PCI bridge> at device 8.1 numa-domain 0 on pci0
pci6: <ACPI PCI bus> numa-domain 0 on pcib6
pci6: <encrypt/decrypt> at device 0.1 (no driver attached)
ahci0: <AMD KERNCZ AHCI SATA controller> mem 0xf9a02000-0xf9a02fff at device 0.2 numa-domain 0 on pci6
ahci0: AHCI v1.31 with 1 6Gbps ports, Port Multiplier supported with FBS
ahcich0: <AHCI channel> at channel 0 on ahci0
isab0: <PCI-ISA bridge> at device 20.3 numa-domain 0 on pci0
isa0: <ISA bus> numa-domain 0 on isab0
pcib7: <ACPI Host-PCI bridge> numa-domain 1 on acpi0
pci7: <ACPI PCI bus> numa-domain 1 on pcib7
pci7: <base peripheral, IOMMU> at device 0.2 (no driver attached)
pcib8: <ACPI PCI-PCI bridge> at device 7.1 numa-domain 1 on pci7
pci8: <ACPI PCI bus> numa-domain 1 on pcib8
pci8: <encrypt/decrypt> at device 0.2 (no driver attached)
xhci1: <XHCI (generic) USB 3.0 controller> mem 0xe8200000-0xe82fffff at device 0.3 numa-domain 1 on pci8
xhci1: 64 bytes context size, 64-bit DMA
xhci1: xECP capabilities <LEGACY,PROTO,PROTO,DEBUG>
usbus1 numa-domain 1 on xhci1
usbus1: 5.0Gbps Super Speed USB v3.0
pcib9: <ACPI PCI-PCI bridge> at device 8.1 numa-domain 1 on pci7
pci9: <ACPI PCI bus> numa-domain 1 on pcib9
pci9: <encrypt/decrypt> at device 0.1 (no driver attached)
pcib10: <ACPI Host-PCI bridge> numa-domain 2 on acpi0
pci10: <ACPI PCI bus> numa-domain 2 on pcib10
pci10: <base peripheral, IOMMU> at device 0.2 (no driver attached)
pcib11: <ACPI PCI-PCI bridge> at device 7.1 numa-domain 2 on pci10
pci11: <ACPI PCI bus> numa-domain 2 on pcib11
pci11: <encrypt/decrypt> at device 0.2 (no driver attached)
pcib12: <ACPI PCI-PCI bridge> at device 8.1 numa-domain 2 on pci10
pci12: <ACPI PCI bus> numa-domain 2 on pcib12
pci12: <encrypt/decrypt> at device 0.1 (no driver attached)
pcib13: <ACPI Host-PCI bridge> numa-domain 3 on acpi0
pci13: <ACPI PCI bus> numa-domain 3 on pcib13
pci13: <base peripheral, IOMMU> at device 0.2 (no driver attached)
pcib14: <ACPI PCI-PCI bridge> at device 3.1 numa-domain 3 on pci13
pci14: <ACPI PCI bus> numa-domain 3 on pcib14
mpr0: <Avago Technologies (LSI) SAS3008> port 0x6000-0x60ff mem 0xce500000-0xce50ffff,0xce400000-0xce4fffff at device 0.0 numa-domain 3 on pci14
mpr0: Firmware: 16.00.11.00, Driver: 23.00.00.00-fbsd
mpr0: IOCCapabilities: 7a85c<ScsiTaskFull,DiagTrace,SnapBuf,EEDP,TransRetry,EventReplay,MSIXIndex,HostDisc,FastPath,RDPQArray>
pcib15: <ACPI PCI-PCI bridge> at device 7.1 numa-domain 3 on pci13
pci15: <ACPI PCI bus> numa-domain 3 on pcib15
pci15: <encrypt/decrypt> at device 0.2 (no driver attached)
pcib16: <ACPI PCI-PCI bridge> at device 8.1 numa-domain 3 on pci13
pci16: <ACPI PCI bus> numa-domain 3 on pcib16
pci16: <encrypt/decrypt> at device 0.1 (no driver attached)
pcib17: <ACPI Host-PCI bridge> numa-domain 4 on acpi0
pci17: <ACPI PCI bus> numa-domain 4 on pcib17
pci17: <base peripheral, IOMMU> at device 0.2 (no driver attached)
pcib18: <ACPI PCI-PCI bridge> at device 7.1 numa-domain 4 on pci17
pci18: <ACPI PCI bus> numa-domain 4 on pcib18
pci18: <encrypt/decrypt> at device 0.2 (no driver attached)
pcib19: <ACPI PCI-PCI bridge> at device 8.1 numa-domain 4 on pci17
pci19: <ACPI PCI bus> numa-domain 4 on pcib19
pci19: <encrypt/decrypt> at device 0.1 (no driver attached)
pcib20: <ACPI Host-PCI bridge> numa-domain 5 on acpi0
pci20: <ACPI PCI bus> numa-domain 5 on pcib20
pci20: <base peripheral, IOMMU> at device 0.2 (no driver attached)
pcib21: <ACPI PCI-PCI bridge> at device 7.1 numa-domain 5 on pci20
pci21: <ACPI PCI bus> numa-domain 5 on pcib21
pci21: <encrypt/decrypt> at device 0.2 (no driver attached)
pcib22: <ACPI PCI-PCI bridge> at device 8.1 numa-domain 5 on pci20
pci22: <ACPI PCI bus> numa-domain 5 on pcib22
pci22: <encrypt/decrypt> at device 0.1 (no driver attached)
pcib23: <ACPI Host-PCI bridge> numa-domain 6 on acpi0
pci23: <ACPI PCI bus> numa-domain 6 on pcib23
pci23: <base peripheral, IOMMU> at device 0.2 (no driver attached)
pcib24: <ACPI PCI-PCI bridge> at device 7.1 numa-domain 6 on pci23
pci24: <ACPI PCI bus> numa-domain 6 on pcib24
pci24: <encrypt/decrypt> at device 0.2 (no driver attached)
pcib25: <ACPI PCI-PCI bridge> at device 8.1 numa-domain 6 on pci23
pci25: <ACPI PCI bus> numa-domain 6 on pcib25
pci25: <encrypt/decrypt> at device 0.1 (no driver attached)
pcib26: <ACPI Host-PCI bridge> numa-domain 7 on acpi0
pci26: <ACPI PCI bus> numa-domain 7 on pcib26
pci26: <base peripheral, IOMMU> at device 0.2 (no driver attached)
pcib27: <ACPI PCI-PCI bridge> at device 7.1 numa-domain 7 on pci26
pci27: <ACPI PCI bus> numa-domain 7 on pcib27
pci27: <encrypt/decrypt> at device 0.2 (no driver attached)
pcib28: <ACPI PCI-PCI bridge> at device 8.1 numa-domain 7 on pci26
pci28: <ACPI PCI bus> numa-domain 7 on pcib28
pci28: <encrypt/decrypt> at device 0.1 (no driver attached)
cpu0: <ACPI CPU> on acpi0
uart1: <16550 or compatible> port 0x2f8-0x2ff irq 3 on acpi0
uart0: <16550 or compatible> port 0x3f8-0x3ff irq 4 flags 0x10 on acpi0
orm0: <ISA Option ROM> at iomem 0xed800-0xf17ff pnpid ORM0000 on isa0
vga0: <Generic ISA VGA> at port 0x3d0-0x3db iomem 0xb8000-0xbffff pnpid PNP0900 on isa0
hwpstate0: <Cool`n'Quiet 2.0> on cpu0
cpufreq0: <CPU frequency control> on cpu0
Timecounter "TSC-low" frequency 1247656021 Hz quality 1000
Timecounters tick every 1.000 msec
ugen1.1: <AMD XHCI root HUB> at usbus1
ugen0.1: <AMD XHCI root HUB> at usbus0
uhub0 numa-domain 1 on usbus1
uhub0: <AMD XHCI root HUB, class 9/0, rev 3.00/1.00, addr 1> on usbus1
uhub1 numa-domain 0 on usbus0
uhub1: <AMD XHCI root HUB, class 9/0, rev 3.00/1.00, addr 1> on usbus0
ZFS filesystem version: 5
ZFS storage pool version: features support (5000)
uhub1: 4 ports with 4 removable, self powered
uhub0: 4 ports with 4 removable, self powered
mpr0: Found device <881<SataDev,Direct>,End Device> <12.0Gbps> handle<0x000a> enclosureHandle<0x0002> slot 0
mpr0: At enclosure level 1 and connector name (    )
mpr0: Found device <881<SataDev,Direct>,End Device> <12.0Gbps> handle<0x000b> enclosureHandle<0x0002> slot 1
mpr0: At enclosure level 1 and connector name (    )
mpr0: Found device <881<SataDev,Direct>,End Device> <12.0Gbps> handle<0x0017> enclosureHandle<0x0002> slot 2
mpr0: At enclosure level 1 and connector name (    )
mpr0: Found device <881<SataDev,Direct>,End Device> <12.0Gbps> handle<0x000c> enclosureHandle<0x0002> slot 3
mpr0: At enclosure level 1 and connector name (    )
mpr0: Found device <881<SataDev,Direct>,End Device> <12.0Gbps> handle<0x000d> enclosureHandle<0x0002> slot 4
mpr0: At enclosure level 1 and connector name (    )
mpr0: Found device <881<SataDev,Direct>,End Device> <12.0Gbps> handle<0x0018> enclosureHandle<0x0002> slot 5
mpr0: At enclosure level 1 and connector name (    )
mpr0: Found device <881<SataDev,Direct>,End Device> <12.0Gbps> handle<0x000e> enclosureHandle<0x0002> slot 6
mpr0: At enclosure level 1 and connector name (    )
mpr0: Found device <881<SataDev,Direct>,End Device> <12.0Gbps> handle<0x000f> enclosureHandle<0x0002> slot 7
mpr0: At enclosure level 1 and connector name (    )
mpr0: Found device <881<SataDev,Direct>,End Device> <12.0Gbps> handle<0x0010> enclosureHandle<0x0002> slot 8
mpr0: At enclosure level 1 and connector name (    )
mpr0: Found device <881<SataDev,Direct>,End Device> <12.0Gbps> handle<0x0011> enclosureHandle<0x0002> slot 9
mpr0: At enclosure level 1 and connector name (    )
mpr0: Found device <881<SataDev,Direct>,End Device> <12.0Gbps> handle<0x0012> enclosureHandle<0x0002> slot 10
mpr0: At enclosure level 1 and connector name (    )
mpr0: Found device <881<SataDev,Direct>,End Device> <12.0Gbps> handle<0x0019> enclosureHandle<0x0002> slot 11
mpr0: At enclosure level 1 and connector name (    )
mpr0: Found device <881<SataDev,Direct>,End Device> <12.0Gbps> handle<0x0013> enclosureHandle<0x0002> slot 12
mpr0: At enclosure level 1 and connector name (    )
mpr0: Found device <881<SataDev,Direct>,End Device> <12.0Gbps> handle<0x0014> enclosureHandle<0x0002> slot 14
mpr0: At enclosure level 1 and connector name (    )
mpr0: Found device <881<SataDev,Direct>,End Device> <12.0Gbps> handle<0x0015> enclosureHandle<0x0002> slot 15
mpr0: At enclosure level 1 and connector name (    )
mpr0: Found device <4c11<SmpInit,SspTarg,Direct,SepDev>,End Device> <12.0Gbps> handle<0x0016> enclosureHandle<0x0002> slot 18
mpr0: At enclosure level 1 and connector name (    )
ses0 at mpr0 bus 0 scbus1 target 26 lun 0
ses0: <DP BP14G+EXP 2.52> Fixed Enclosure Services SPC-4 SCSI device
ses0: 1200.000MB/s transfers
ses0: Command Queueing enabled
ses0: SES Device
ses0: da0,pass0 in 'Drive Slot 0', SAS Slot: 2 phys at slot 0
ses0:  phy 0: SATA device
ses0:  phy 0: parent 500056b345a433ff addr 500056b345a433c0
ses0:  phy 1: SAS device type 0 phy 0
ses0:  phy 1: parent 0 addr 0
ses0: da1,pass1 in 'Drive Slot 1', SAS Slot: 2 phys at slot 1
ses0:  phy 0: SATA device
ses0:  phy 0: parent 500056b345a433ff addr 500056b345a433c1
ses0:  phy 1: SAS device type 0 phy 0
ses0:  phy 1: parent 0 addr 0
ses0: da2,pass2 in 'Drive Slot 2', SAS Slot: 2 phys at slot 2
ses0:  phy 0: SATA device
ses0:  phy 0: parent 500056b345a433ff addr 500056b345a433c2
ses0:  phy 1: SAS device type 0 phy 0
ses0:  phy 1: parent 0 addr 0
ses0: da3,pass3 in 'Drive Slot 3', SAS Slot: 2 phys at slot 3
ses0:  phy 0: SATA device
ses0:  phy 0: parent 500056b345a433ff addr 500056b345a433c3
ses0:  phy 1: SAS device type 0 phy 0
ses0:  phy 1: parent 0 addr 0
ses0: da4,pass4 in 'Drive Slot 4', SAS Slot: 2 phys at slot 4
ses0:  phy 0: SATA device
ses0:  phy 0: parent 500056b345a433ff addr 500056b345a433c4
ses0:  phy 1: SAS device type 0 phy 0
ses0:  phy 1: parent 0 addr 0
ses0: da5,pass5 in 'Drive Slot 5', SAS Slot: 2 phys at slot 5
ses0:  phy 0: SATA device
ses0:  phy 0: parent 500056b345a433ff addr 500056b345a433c5
ses0:  phy 1: SAS device type 0 phy 0
ses0:  phy 1: parent 0 addr 0
ses0: da6,pass6 in 'Drive Slot 6', SAS Slot: 2 phys at slot 6
ses0:  phy 0: SATA device
ses0:  phy 0: parent 500056b345a433ff addr 500056b345a433c6
ses0:  phy 1: SAS device type 0 phy 0
ses0:  phy 1: parent 0 addr 0
ses0: da7,pass7 in 'Drive Slot 7', SAS Slot: 2 phys at slot 7
ses0:  phy 0: SATA device
ses0:  phy 0: parent 500056b345a433ff addr 500056b345a433c7
ses0:  phy 1: SAS device type 0 phy 0
ses0:  phy 1: parent 0 addr 0
ses0: da8,pass8 in 'Drive Slot 8', SAS Slot: 2 phys at slot 8
ses0:  phy 0: SATA device
ses0:  phy 0: parent 500056b345a433ff addr 500056b345a433c8
ses0:  phy 1: SAS device type 0 phy 0
ses0:  phy 1: parent 0 addr 0
ses0: da9,pass9 in 'Drive Slot 9', SAS Slot: 2 phys at slot 9
ses0:  phy 0: SATA device
ses0:  phy 0: parent 500056b345a433ff addr 500056b345a433c9
ses0:  phy 1: SAS device type 0 phy 0
ses0:  phy 1: parent 0 addr 0
ses0: da10,pass10 in 'Drive Slot 10', SAS Slot: 2 phys at slot 10
ses0:  phy 0: SATA device
ses0:  phy 0: parent 500056b345a433ff addr 500056b345a433ca
ses0:  phy 1: SAS device type 0 phy 0
ses0:  phy 1: parent 0 addr 0
ses0: da11,pass11 in 'Drive Slot 11', SAS Slot: 2 phys at slot 11
ses0:  phy 0: SATA device
ses0:  phy 0: parent 500056b345a433ff addr 500056b345a433cb
ses0:  phy 1: SAS device type 0 phy 0
ses0:  phy 1: parent 0 addr 0
ses0: da12,pass12 in 'Drive Slot 12', SAS Slot: 2 phys at slot 12
ses0:  phy 0: SATA device
ses0:  phy 0: parent 500056b345a433ff addr 500056b345a433cc
ses0:  phy 1: SAS device type 0 phy 0
ses0:  phy 1: parent 0 addr 0
ses0: da13,pass13 in 'Drive Slot 14', SAS Slot: 2 phys at slot 14
ses0:  phy 0: SATA device
ses0:  phy 0: parent 500056b345a433ff addr 500056b345a433ce
ses0:  phy 1: SAS device type 0 phy 0
ses0:  phy 1: parent 0 addr 0
ses0: da14,pass14 in 'Drive Slot 15', SAS Slot: 2 phys at slot 15
ses0:  phy 0: SATA device
ses0:  phy 0: parent 500056b345a433ff addr 500056b345a433cf
ses0:  phy 1: SAS device type 0 phy 0
ses0:  phy 1: parent 0 addr 0
da14 at mpr0 bus 0 scbus1 target 23 lun 0
da14: <ATA MTFDDAK480TDN F005> Fixed Direct Access SPC-4 SCSI device
da14: Serial Number 191821E45DA1
da14: 1200.000MB/s transfers
da14: Command Queueing enabled
da14: 457862MB (937703088 512 byte sectors)
da13 at mpr0 bus 0 scbus1 target 22 lun 0
da13: <ATA MTFDDAK480TDN F005> Fixed Direct Access SPC-4 SCSI device
da13: Serial Number 191821E45D17
da13: 1200.000MB/s transfers
da13: Command Queueing enabled
da13: 457862MB (937703088 512 byte sectors)
da7 at mpr0 bus 0 scbus1 target 15 lun 0
da7: <ATA HGST HUH721212AL NT11> Fixed Direct Access SPC-4 SCSI device
da7: Serial Number 8CGSV8YG
da7: 1200.000MB/s transfers
da7: Command Queueing enabled
da7: 11444224MB (23437770752 512 byte sectors)
da10 at mpr0 bus 0 scbus1 target 18 lun 0
da10: <ATA HGST HUH721212AL NT11> Fixed Direct Access SPC-4 SCSI device
da10: Serial Number 8CGSX4UG
da10: 1200.000MB/s transfers
da10: Command Queueing enabled
da10: 11444224MB (23437770752 512 byte sectors)
da6 at mpr0 bus 0 scbus1 target 14 lun 0
da6: <ATA HGST HUH721212AL NT11> Fixed Direct Access SPC-4 SCSI device
da6: Serial Number 8CGSZY5G
da6: 1200.000MB/s transfers
da6: Command Queueing enabled
da6: 11444224MB (23437770752 512 byte sectors)
da11 at mpr0 bus 0 scbus1 target 19 lun 0
da11: <ATA HGST HUH721212AL NT11> Fixed Direct Access SPC-4 SCSI device
da11: Serial Number 8CGSDEHG
da11: 1200.000MB/s transfers
da11: Command Queueing enabled
da11: 11444224MB (23437770752 512 byte sectors)
da5 at mpr0 bus 0 scbus1 target 13 lun 0
da5: <ATA HGST HUH721212AL NT11> Fixed Direct Access SPC-4 SCSI device
da5: Serial Number 8CGSZ0VG
da5: 1200.000MB/s transfers
da5: Command Queueing enabled
da5: 11444224MB (23437770752 512 byte sectors)
da1 at mpr0 bus 0 scbus1 target 9 lun 0
da1: <ATA HGST HUH721212AL NT11> Fixed Direct Access SPC-4 SCSI device
da1: Serial Number 8CGSXG6G
da1: 1200.000MB/s transfers
da1: Command Queueing enabled
da1: 11444224MB (23437770752 512 byte sectors)
da2 at mpr0 bus 0 scbus1 target 10 lun 0
da2: <ATA HGST HUH721212AL NT11> Fixed Direct Access SPC-4 SCSI device
da2: Serial Number 8HGAWR3H
da2: 1200.000MB/s transfers
da2: Command Queueing enabled
da2: 11444224MB (23437770752 512 byte sectors)
da0 at mpr0 bus 0 scbus1 target 8 lun 0
da0: <ATA HGST HUH721212AL NT11> Fixed Direct Access SPC-4 SCSI device
da0: Serial Number 8CGSV9DG
da0: 1200.000MB/s transfers
da0: Command Queueing enabled
da0: 11444224MB (23437770752 512 byte sectors)
da3 at mpr0 bus 0 scbus1 target 11 lun 0
da3: <ATA HGST HUH721212AL NT11> Fixed Direct Access SPC-4 SCSI device
da3: Serial Number 8CGSVS3G
da3: 1200.000MB/s transfers
da3: Command Queueing enabled
da3: 11444224MB (23437770752 512 byte sectors)
da4 at mpr0 bus 0 scbus1 target 12 lun 0
da4: <ATA HGST HUH721212AL NT11> Fixed Direct Access SPC-4 SCSI device
da4: Serial Number 8CGSB6YG
da4: 1200.000MB/s transfers
da4: Command Queueing enabled
da4: 11444224MB (23437770752 512 byte sectors)
da8 at mpr0 bus 0 scbus1 target 16 lun 0
da8: <ATA HGST HUH721212AL NT11> Fixed Direct Access SPC-4 SCSI device
da8: Serial Number 8CGS875G
da8: 1200.000MB/s transfers
da8: Command Queueing enabled
da8: 11444224MB (23437770752 512 byte sectors)
da9 at mpr0 bus 0 scbus1 target 17 lun 0
da9: <ATA HGST HUH721212AL NT11> Fixed Direct Access SPC-4 SCSI device
da9: Serial Number 8CGSBA2G
da9: 1200.000MB/s transfers
da9: Command Queueing enabled
da9: 11444224MB (23437770752 512 byte sectors)
da12 at mpr0 bus 0 scbus1 target 20 lun 0
da12: <ATA ST1000NM0018-2F2 EA04> Fixed Direct Access SPC-4 SCSI device
da12: Serial Number ZFA0NVQD
da12: 1200.000MB/s transfers
da12: Command Queueing enabled
da12: 953869MB (1953525168 512 byte sectors)
Trying to mount root from zfs:zroot/ROOT/default []...
ugen0.2: <vendor 0x1604 product 0x10c0> at usbus0
uhub2 numa-domain 0 on uhub1
uhub2: <vendor 0x1604 product 0x10c0, class 9/0, rev 2.00/0.00, addr 1> on usbus0
Root mount waiting for: usbus0
Root mount waiting for: usbus0
uhub2: 4 ports with 4 removable, self powered
ugen0.3: <vendor 0x1604 product 0x10c0> at usbus0
uhub3 numa-domain 0 on uhub2
uhub3: <vendor 0x1604 product 0x10c0, class 9/0, rev 2.00/0.00, addr 2> on usbus0
Root mount waiting for: usbus0
Root mount waiting for: usbus0
uhub3: 4 ports with 4 removable, self powered
Root mount waiting for: usbus0
ugen0.4: <DELL DRAC 5 Virtual Keyboard and Mouse> at usbus0
usbhid0 numa-domain 0 on uhub2
usbhid0: <DELL DRAC 5 Virtual Keyboard and Mouse, class 0/0, rev 2.00/0.00, addr 3> on usbus0
hidbus0: <HID bus> numa-domain 0 on usbhid0
usbhid1 numa-domain 0 on uhub2
usbhid1: <DELL DRAC 5 Virtual Keyboard and Mouse, class 0/0, rev 2.00/0.00, addr 3> on usbus0
hidbus1: <HID bus> numa-domain 0 on usbhid1
hkbd0: <DELL DRAC 5 Virtual Keyboard and Mouse> numa-domain 0 on hidbus1
kbd1 at hkbd0
ugen0.5: <vendor 0x1604 product 0x10c0> at usbus0
uhub4 numa-domain 0 on uhub2
uhub4: <vendor 0x1604 product 0x10c0, class 9/0, rev 2.00/0.00, addr 4> on usbus0
Root mount waiting for: usbus0
Root mount waiting for: usbus0
Root mount waiting for: usbus0
uhub4: 4 ports with 4 removable, self powered
ugen0.6: <Microchip Tech USB2734> at usbus0
uhub5 numa-domain 0 on uhub1
uhub5: <Microchip Tech USB2734, class 9/0, rev 2.10/1.21, addr 5> on usbus0
uhub5: MTT enabled
Root mount waiting for: usbus0
uhub5: 4 ports with 4 removable, self powered
ugen0.7: <ATEN UC-10KM V1.3.124> at usbus0
usbhid2 numa-domain 0 on uhub5
usbhid2: <ATEN UC-10KM V1.3.124, class 0/0, rev 1.10/1.00, addr 6> on usbus0
hidbus2: <HID bus> numa-domain 0 on usbhid2
hkbd1: <ATEN UC-10KM V1.3.124 Keyboard> numa-domain 0 on hidbus2
kbd2 at hkbd1
usbhid3 numa-domain 0 on uhub5
usbhid3: <ATEN UC-10KM V1.3.124, class 0/0, rev 1.10/1.00, addr 6> on usbus0
hidbus3: <HID bus> numa-domain 0 on usbhid3
Root mount waiting for: usbus0
ugen0.8: <Microchip Tech USB5734> at usbus0
uhub6 numa-domain 0 on uhub1
uhub6: <Microchip Tech USB5734, class 9/0, rev 3.00/1.21, addr 7> on usbus0
uhub6: 4 ports with 4 removable, self powered
intsmb0: <AMD FCH SMBus Controller> at device 20.0 numa-domain 0 on pci0
smbus0: <System Management Bus> numa-domain 0 on intsmb0
bnxt0: <Broadcom BCM57412 NetXtreme-E 10Gb Ethernet> mem 0xec310000-0xec31ffff,0xec200000-0xec2fffff,0xec322000-0xec323fff at device 0.0 numa-domain 0 on pci1
bnxt0: Using 256 TX descriptors and 256 RX descriptors
bnxt0: Using 2 RX queues 2 TX queues
bnxt0: Using MSI-X interrupts with 11 vectors
bnxt0: Ethernet address: b0:26:28:b3:5b:3a
bnxt0: netmap queues/slots: TX 2/256, RX 2/256
bnxt1: <Broadcom BCM57412 NetXtreme-E 10Gb Ethernet> mem 0xec300000-0xec30ffff,0xec100000-0xec1fffff,0xec320000-0xec321fff at device 0.1 numa-domain 0 on pci1
bnxt1: Using 256 TX descriptors and 256 RX descriptors
bnxt1: Using 2 RX queues 2 TX queues
bnxt1: Using MSI-X interrupts with 11 vectors
bnxt1: Ethernet address: b0:26:28:b3:5b:3b
bnxt1: netmap queues/slots: TX 2/256, RX 2/256
hms0: <DELL DRAC 5 Virtual Keyboard and Mouse Tablet> numa-domain 0 on hidbus0
hms0: 3 buttons and [XYW] coordinates ID=0
hms1: <ATEN UC-10KM V1.3.124 Mouse> numa-domain 0 on hidbus3
hms1: 5 buttons and [XYW] coordinates ID=0
CPU: AMD EPYC 7261 8-Core Processor                  (2495.31-MHz K8-class CPU)
  Origin="AuthenticAMD"  Id=0x800f12  Family=0x17  Model=0x1  Stepping=2
  Features=0x178bfbff<FPU,VME,DE,PSE,TSC,MSR,PAE,MCE,CX8,APIC,SEP,MTRR,PGE,MCA,CMOV,PAT,PSE36,CLFLUSH,MMX,FXSR,SSE,SSE2,HTT>
  Features2=0x7ed8320b<SSE3,PCLMULQDQ,MON,SSSE3,FMA,CX16,SSE4.1,SSE4.2,MOVBE,POPCNT,AESNI,XSAVE,OSXSAVE,AVX,F16C,RDRAND>
  AMD Features=0x2e500800<SYSCALL,NX,MMX+,FFXSR,Page1GB,RDTSCP,LM>
  AMD Features2=0x35c233ff<LAHF,CMP,SVM,ExtAPIC,CR8,ABM,SSE4A,MAS,Prefetch,OSVW,SKINIT,WDT,TCE,Topology,PCXC,PNXC,DBE,PL2I,MWAITX>
  Structured Extended Features=0x209c01a9<FSGSBASE,BMI1,AVX2,SMEP,BMI2,RDSEED,ADX,SMAP,CLFLUSHOPT,SHA>
  XSAVE Features=0xf<XSAVEOPT,XSAVEC,XINUSE,XSAVES>
  AMD Extended Feature Extensions ID EBX=0x1007<CLZERO,IRPerf,XSaveErPtr,IBPB>
  SVM: NP,NRIP,VClean,AFlush,DAssist,NAsids=32768
  TSC: P-state invariant, performance statistics
bridge0: Ethernet address: 58:9c:fc:10:cf:5d
bge0: promiscuous mode enabled
bridge0: link state changed to DOWN
lo0: link state changed to UP
bge0: link state changed to DOWN
bge0: link state changed to UP
bridge0: link state changed to UP
sesutil show
[22:28 r7425-01 dvl ~] % sudo sesutil show
ses0: ; ID: 500056b345a433ff
Desc            Dev     Model                     Ident                Size/Status
Drive Slot 0    da0     ATA HGST HUH721212AL      8CGSV9DG             Unknown
Drive Slot 1    da1     ATA HGST HUH721212AL      8CGSXG6G             Unknown
Drive Slot 2    da2     ATA HGST HUH721212AL      8HGAWR3H             Unknown
Drive Slot 3    da3     ATA HGST HUH721212AL      8CGSVS3G             Unknown
Drive Slot 4    da4     ATA HGST HUH721212AL      8CGSB6YG             Unknown
Drive Slot 5    da5     ATA HGST HUH721212AL      8CGSZ0VG             Unknown
Drive Slot 6    da6     ATA HGST HUH721212AL      8CGSZY5G             Unknown
Drive Slot 7    da7     ATA HGST HUH721212AL      8CGSV8YG             Unknown
Drive Slot 8    da8     ATA HGST HUH721212AL      8CGS875G             Unknown
Drive Slot 9    da9     ATA HGST HUH721212AL      8CGSBA2G             Unknown
Drive Slot 10   da10    ATA HGST HUH721212AL      8CGSX4UG             Unknown
Drive Slot 11   da11    ATA HGST HUH721212AL      8CGSDEHG             Unknown
Drive Slot 12   da12    ATA ST1000NM0018-2F2      ZFA0NVQD             Unknown
Drive Slot 13   -       -                         -                    Not Installed
Drive Slot 14   da13    ATA MTFDDAK480TDN         191821E45D17         Unknown
Drive Slot 15   da14    ATA MTFDDAK480TDN         191821E45DA1         Unknown
Drive Slot 16   -       -                         -                    Not Installed
Drive Slot 17   -       -                         -                    Not Installed
jls
[22:28 r7425-01 dvl ~] % jls
   JID  IP Address      Hostname                      Path
     1                  pkg02.int.unixathome.org      /jails/pkg02
camcontrol devlist
[22:28 r7425-01 dvl ~] % sudo camcontrol devlist
        at scbus1 target 8 lun 0 (pass0,da0)
        at scbus1 target 9 lun 0 (pass1,da1)
        at scbus1 target 10 lun 0 (pass2,da2)
        at scbus1 target 11 lun 0 (pass3,da3)
        at scbus1 target 12 lun 0 (pass4,da4)
        at scbus1 target 13 lun 0 (pass5,da5)
        at scbus1 target 14 lun 0 (pass6,da6)
        at scbus1 target 15 lun 0 (pass7,da7)
        at scbus1 target 16 lun 0 (pass8,da8)
        at scbus1 target 17 lun 0 (pass9,da9)
        at scbus1 target 18 lun 0 (pass10,da10)
        at scbus1 target 19 lun 0 (pass11,da11)
        at scbus1 target 20 lun 0 (pass12,da12)
           at scbus1 target 22 lun 0 (pass13,da13)
           at scbus1 target 23 lun 0 (pass14,da14)
                at scbus1 target 26 lun 0 (ses0,pass15)
/etc/fstab
[22:29 r7425-01 dvl ~] % cat /etc/fstab
# Device		Mountpoint	FStype	Options		Dump	Pass#
/dev/gpt/efiboot0		/boot/efi	msdosfs	rw		2	2
/dev/da13p2		none	swap	sw		0	0
/dev/da14p2		none	swap	sw		0	0
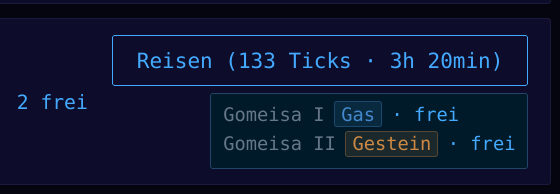
 Das Spiel gibt an bestimmten Stellen Hinweise, wenn etwas noch nicht stimmt. Wer zum Beispiel einen Gesteinsplaneten besiedelt hat, aber noch keinen Bergbau erforscht, bekommt den Hinweis direkt im Dashboard. Kein stilles Warten, keine Raterei warum die Rohstoffe nicht wachsen. Der Tipp verschwindet, sobald die passende Forschung gestartet ist.